First of all,I start with using photoshop for creating my background.
1st, when u go in...u'll see a white background then u used Gradient tool to do gradient background.
2nd , you'll up left side that i marked red arrow which can choose colour
Later, after clicked on it..it would poped out Gradient Editor and from there u can choose your colour wisely....i chose green instead
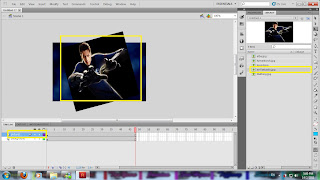
Then, pull the background from the photoshop to your FLASH file, hey adobe photoshop and flash is 1 family, you cant used flash or photoshop alone to make a perfect product out.Alrite now you can see what i highlighted wif red box, from there u put at the right side collumm only you drag it to the centre and name it background.
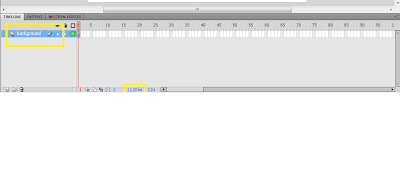
Later, make your background frame till 500 to extent because you need it till the end and make sure lock it which i highlighted how to lock it in order the words background wont b moved when u try to shift your typography.
2ndly, create another new layer for the following steps, i highlighted with yellow box to determined where i should stop by pressing F6 , on the layer there right click it and select create motion preset.Later choose frm the begining of the frame select where u wan to put your typo and go to the end select where u wanted to end.
After that, create new layers follow the steps that is given at step1 then still following the same method as clicking F6 to start and to end a frame and then RIGHT click between them and choose create motion preset and move and expand whichever u desired.
Later, create another new layer for the following one, now this one starting to get tricky, why is said dat? because i wan the ''tumpahnya'' the P, i wan to make it long and fall down motion. so i used a shape tool and choose reactangle and make it like P in order to make it as if the P is falling down.
Later, create another new layer in order to make the ''P'' fall and its like pouring if you can see closely. Ok here how i did it, after the previous layer i drag down and until the extent i wanted, i enlarge the poured to make it as if it's really pouring down.
Alright the hardest part is over, then still continue to to the following steps as click F6 from the begining and till the end that you desire and clicked create motion preset to motion your photography
Later , in order to make the typo go up slowly one by one. you still have to following the following steps as well, also create motion preset the move from the begining till the end.
Now's the most tricky part i wanted to do...i make R-A-J-A but i dun wan the words stay after came out, so what i did is, start with R, i did F6 begining and end F6,later F6 AGAIN on the same layer as R............... R's ending to make it appear immiedietly and R dissapear after ending, u might dont understand what i meant bt after u watch my video u might understood
Soon, this will be the ending,ok i still use the following steps previously used..but this time, different abit, after used create motion preset, i click window and choose motion presets to do my ending..


